If you have a transaction file that doesn't fit any of our presets, don't worry! Capitally allows you to create your own one right in the app.
This guide will walk you through the process.
Step 1: Open the File
Drop a CSV, XLS, XLSX, XML or JSON file on any page in your project, or open it from the import page. Capitally matches it to compatible templates before starting the import; when there is no unambiguous match, you choose among the matching templates or use Import any data.
How the template is chosen
- If you are viewing an account in Portfolio and a matching template has imported into it before, the last-used one opens and the import targets that account.
- Otherwise, if exactly one template recognizes every required section by its header, that template opens directly.
- Otherwise,
Choose the import templatelists the matching templates and offersImport any dataas the fallback.
Opening or pasting data on the import page follows the same resolution. A supported file whose browser type is missing is identified from its extension.
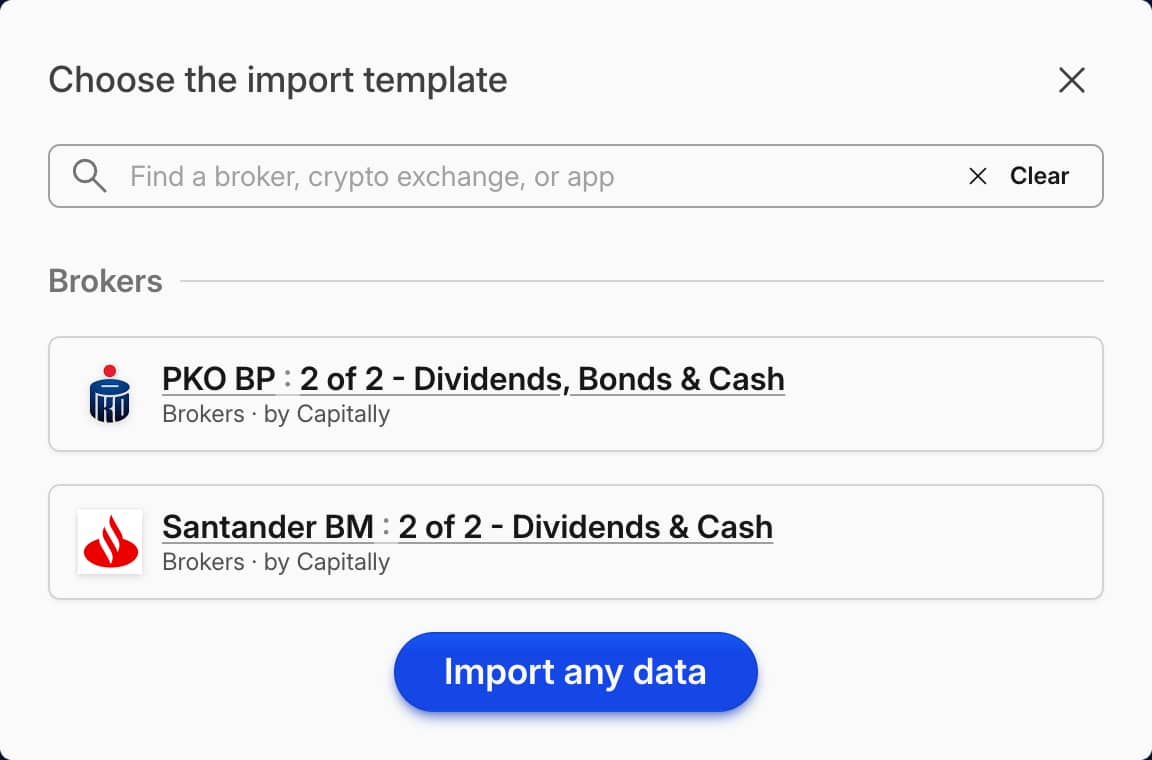 Choose the import template lists the matching templates, with Import any data as the fallback
Ensure it loaded correctly and pick data range if needed. By default all rows are included and first row is used as a header with column names, but you can easily change that by clicking on the From here, To here and Header buttons.
If your data file needs more preparation, click the cog icon in the lower-right corner to access additional options, such as choosing an Excel sheet, special character encoding, replacing header names, and more.
Your data does not leave your device
It's worth noting, that whatever file you drop on Capitally it will always be handled locally. It doesn't have to be sent to our servers or elsewhere. Plus the transactions that you decide to import out of it will be encrypted.
PDF statements
If your broker only issues PDFs — Trade Republic and Swissquote are the usual cases — pass the first few pages through an AI or OCR tool that reads tables, check the numbers it produced, then paste the resulting table into Capitally with Import any data. Save the preset on that first run and every later statement takes seconds. If the broker offers a CSV or Excel export anywhere in its interface, use that instead, and send us a sample so we can build a preset for it.
Date and number formats
Dates written as DD/MM/YYYY with slashes are read in the US order, MM/DD/YYYY: 06/09/2024 imports as 9 June, not 6 September. Nothing errors, so the mistake usually surfaces months later as wrong holding periods and wrong tax years. Every other common layout — YYYY-MM-DD, DD-MM-YYYY, MM-DD-YYYY — is detected automatically.
The date format you picked in your profile has no effect here: import reads dates from the file, so switching the display format will not make a slash-separated European file land correctly. See Settings and display preferences for what the formatting settings do and don't reach.
If your file uses slashes in the European order, convert the separator as it comes in:
- Turn on early access features in Settings.
- In the import template, enable a formula on the Date column.
- Use
regexReplace(value, '/', '-'). With dashes, the date parses as DD-MM-YYYY. - Save the template on that first import so you never repeat this.
Dates and numbers are parsed from the file, not from your profile settings. The parse step's How to read this data? panel holds Date Format — set it to Day-Month-Year for a European file whose dates use slashes — and Decimal Separator, for files that use a comma. Both are saved into the template on the first import, so you set them once per broker. Some broker presets also strip thousands separators themselves.
Whatever format your file uses, sort the rows by date in the review step and check that the earliest and latest dates look right before you confirm the import.
Step 2: Tell us what to do with it
On the next screen, let us know what this data is about.
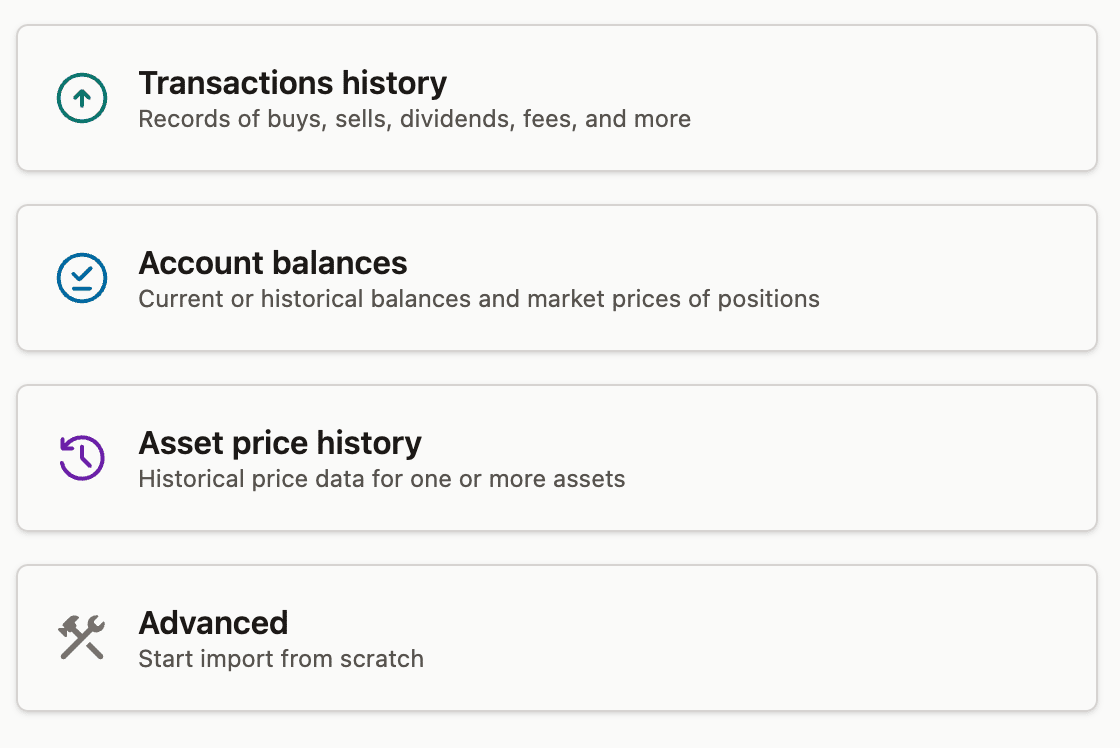
We'll then ask you to match the data columns to transaction properties. Depending on the data provided, we might be able to match most properties ourselves. Just verify the list, select a data column, or choose a single value for all rows. You can also delete properties you don't plan to import by clicking the trash can icon, but remember, that some are required.
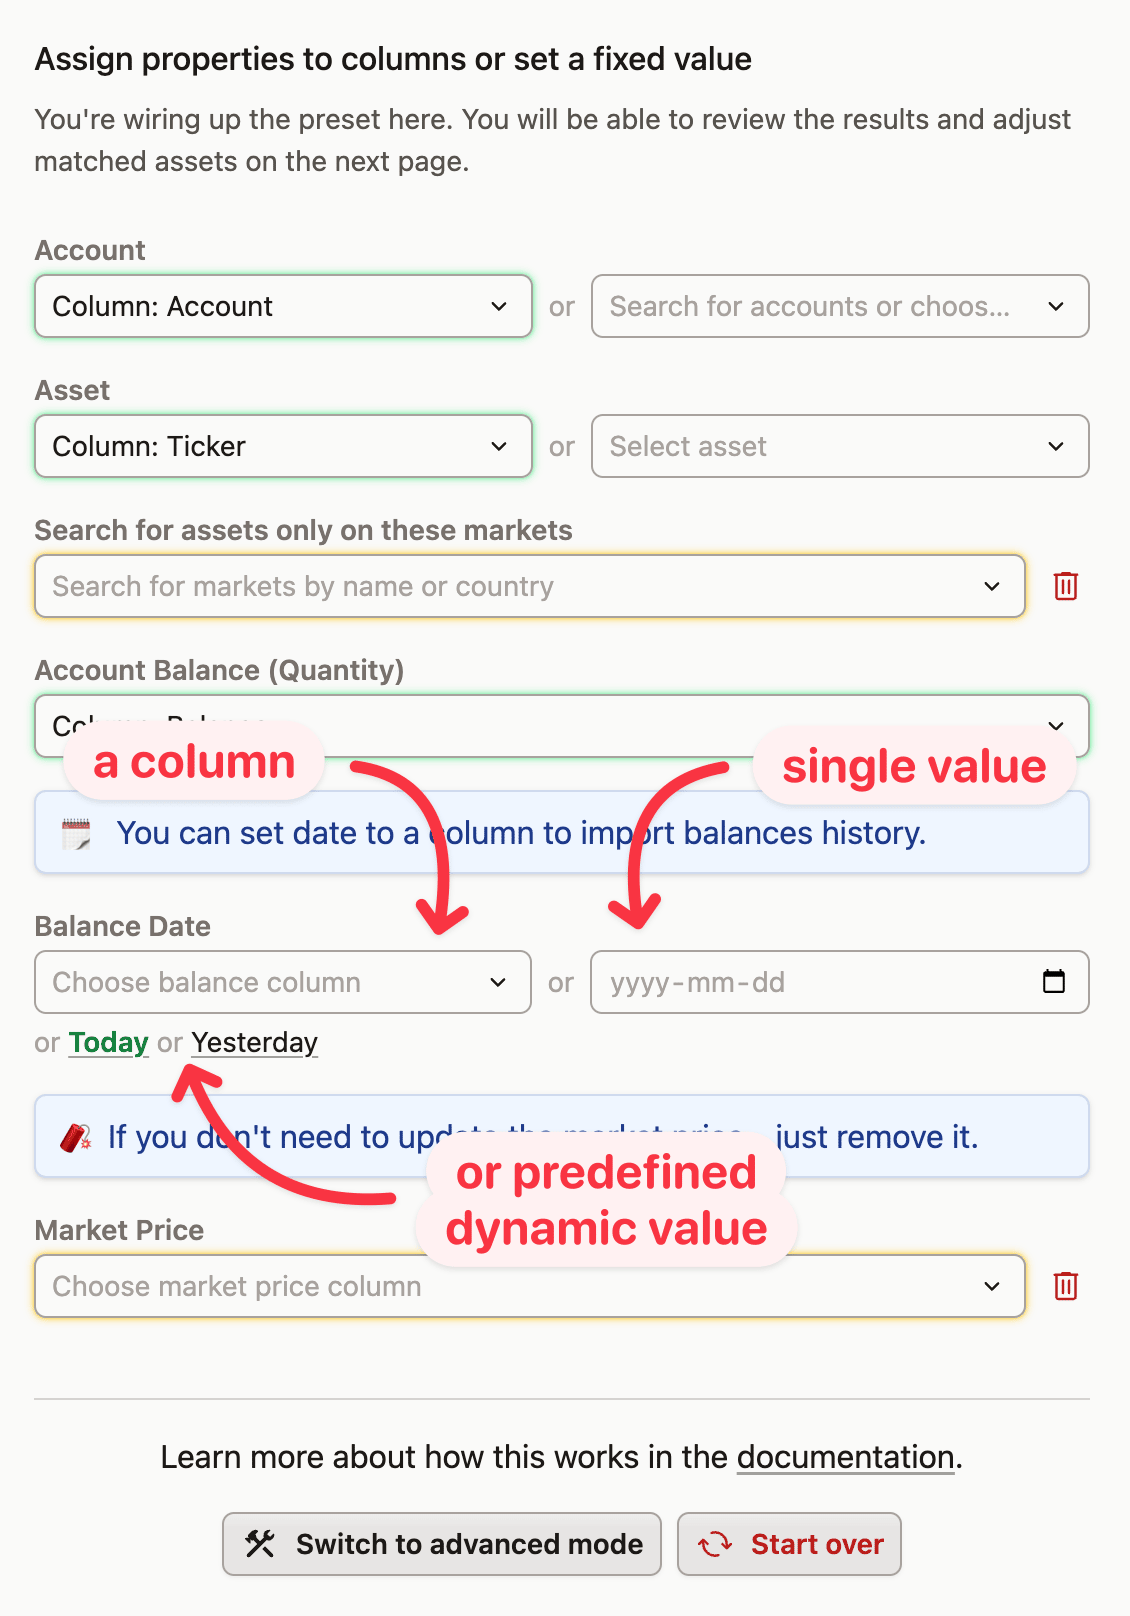
See the Transaction Properties Reference for details about particular properties.
Tags are among those properties, for transactions and for the assets and accounts a file creates, so a column of your own labels comes in with the data — no advanced mode needed. See Tags for how they then propagate.
Simple mode
What you see above is called the Simple mode. If your data is more complex, like requiring conditional handling, you can always switch to Advanced mode.
Note, that you never loose anything when switching between modes - the interface simply gives you more or less options to choose from.
Transactions History template
If you want to quickly import multiple transactions without matching the columns, just use the below spreadsheet template.
- Clone the spreadsheet or create your own with similar column names,
- Fill the spreadsheet with your data,
- Copy or save to a CSV file,
- Import to Capitally with
Import any data, - Choose
Transactions historyfrom the list.
Filling all columns is not mandatory!
You don't need to include all columns in the spreadsheet. You can leave them empty and select a single value for all rows in the import interface, or ignore them altogether.
For example, to backtest a portfolio - just enter the cash amount bought or sold in the value column, and remove Quantity and Price columns (in .
What the Transactions history preset supports
The preset reads one row per transaction and works the rest out from your columns. Buys and sells keep a positive quantity, with the type carrying the direction. Price is optional: leave it out and the market price for that date is used, or the price is derived from value ÷ quantity. The value's sign is always aligned to the quantity's, so a derived price is never negative, however your file signs outflows.
- Transfers — a
Withdrawal-style label produces a negative quantity, whileTransferandDepositkeep whatever sign the file carries, so pre-signed columns work as they are. - Dividends, interest and rent — the amount becomes the transaction value, the withholding-tax column becomes Tax Paid.
- Fees and other cash movements — the amount becomes the value, negative for an expense.
- Options — a row imports as an option when it carries both a strike price and an expiry date, even if its type column only says Buy or Sell, and also when the type itself says Option, Call, Put, Expiration or Exercise. Put versus Call is read from the option-type column (
put/call/p/c, including a trailing letter on an option symbol). Sold, expired and exercised contracts get a negative quantity, exercised ones open a position in the underlying, and the contract multiplier defaults to 100. Options need the Stock Options plan feature. - Private equity —
Commitmentbecomes a capital commitment,Capital callorDrawdownan opening transaction,Distributiona dividend. A capital call carrying only an amount needs the fund's asset to be priceless; otherwise map the amount to Quantity as well.
Two labels worth knowing: Sell to open and Buy to close are read by their leading word, so they become a sale and a purchase. And "Capital call" is matched before options, so the word "call" in it doesn't turn the row into an option.
What the preset won't do
Multi-leg option strategies, assignment chains and the stock leg that follows an exercise aren't derived for you. Only one column can be mapped per field, so a file that splits buys and sells across two amount columns needs advanced mode. A type label the preset can't recognise fails that row with an error note: either set one fixed type for all rows, or switch to advanced mode.
Backtesting a strategy with regular purchases
Build one spreadsheet with a row per purchase — date, asset, purchase value — and import it in one go. Do not map Price or Quantity. Mapping Price and leaving it empty fails every row with price: Invalid input: expected number, received null; click the trash icon next to Price and Quantity to remove those fields entirely, and map the cash amount to Value instead. The market price for the date is then used automatically.
For ongoing month-by-month buying, an advanced-mode preset that generates the buys from a single pasted amount is the better fit.
Step 3: Review the items to be imported
On the next screen we'll show you the accounts, assets, currencies or markets that we found for your data. Review the list, correcting any wrong guesses and filling the blanks.
Assets are matched by whichever column you picked — symbol, ISIN or name — against the whole catalogue, so this is the step where a wrong match gets corrected. For an unmatched asset, the row's Create button opens the Add asset form with its name, symbol, ISIN and type pre-filled from the file; an unmatched account is pre-filled with its name.
When several assets or accounts are confirmed missing, Create N missing objects in the warning creates them as one batch. After a successful batch, the toast's Undo reverses it. A lookup error still offers the row's Create shortcut, but is excluded from bulk creation so you can review it before creating a possible duplicate.
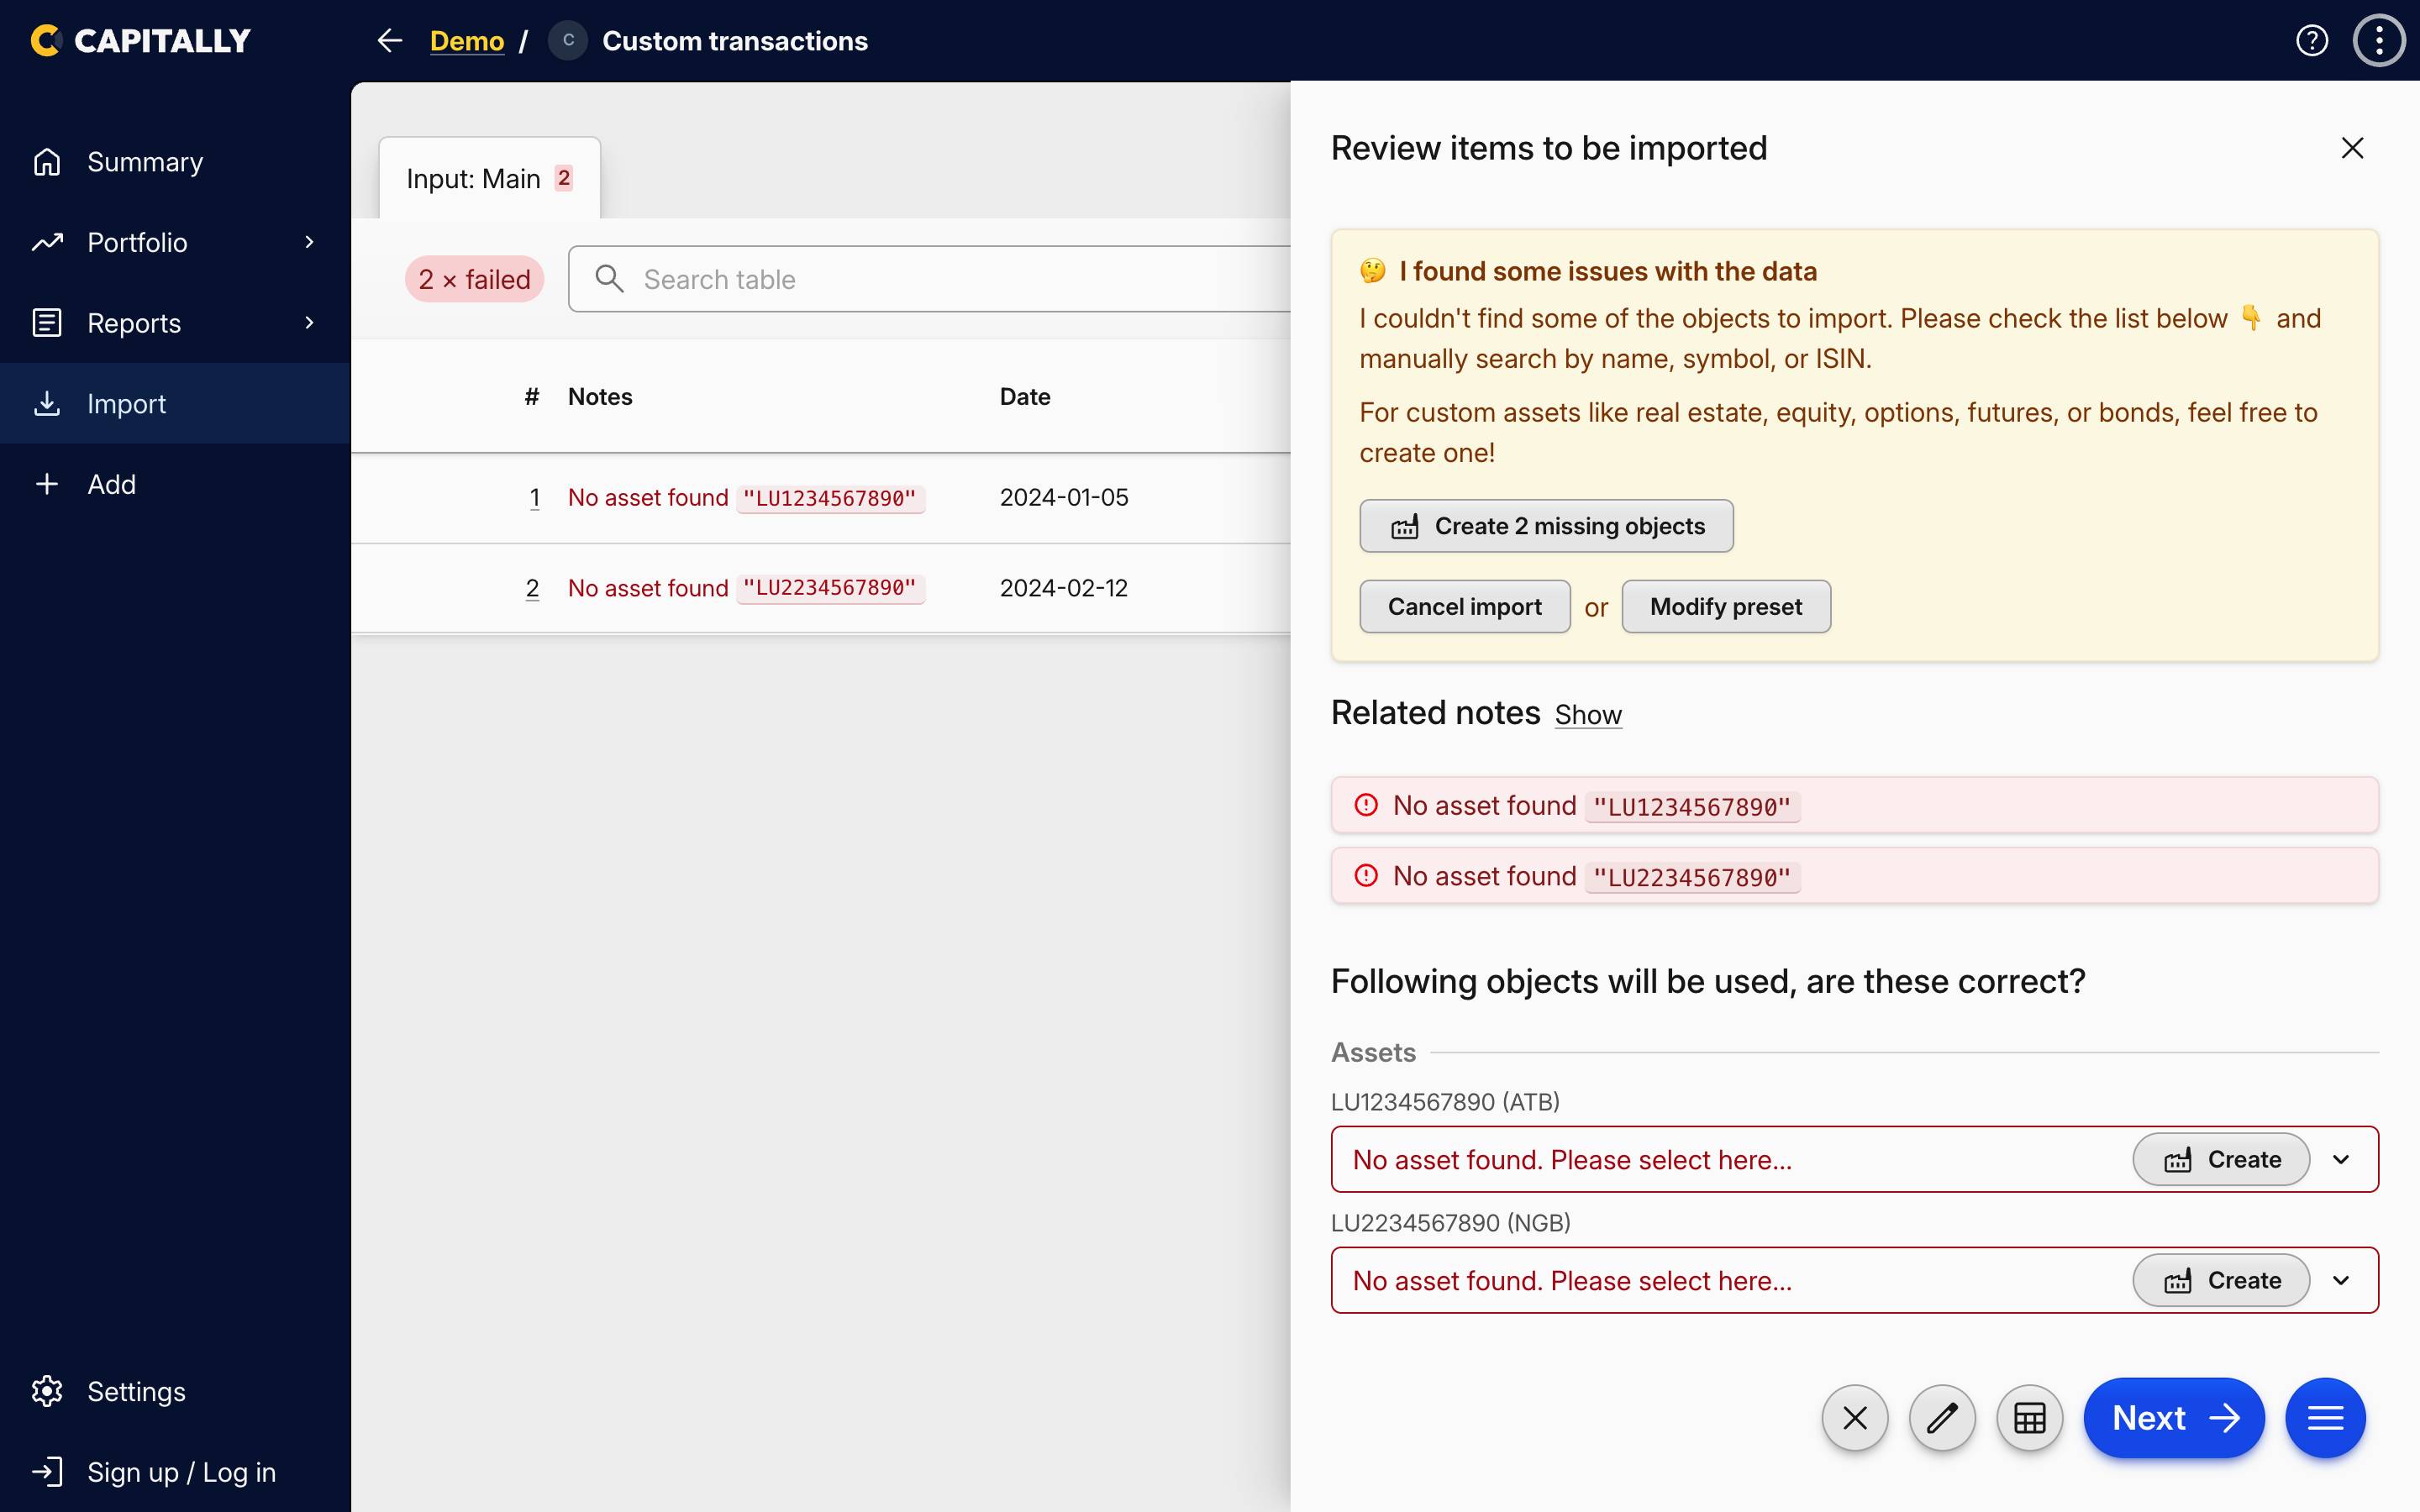 Two unmatched assets in review: Create 2 missing objects and the inline Create buttons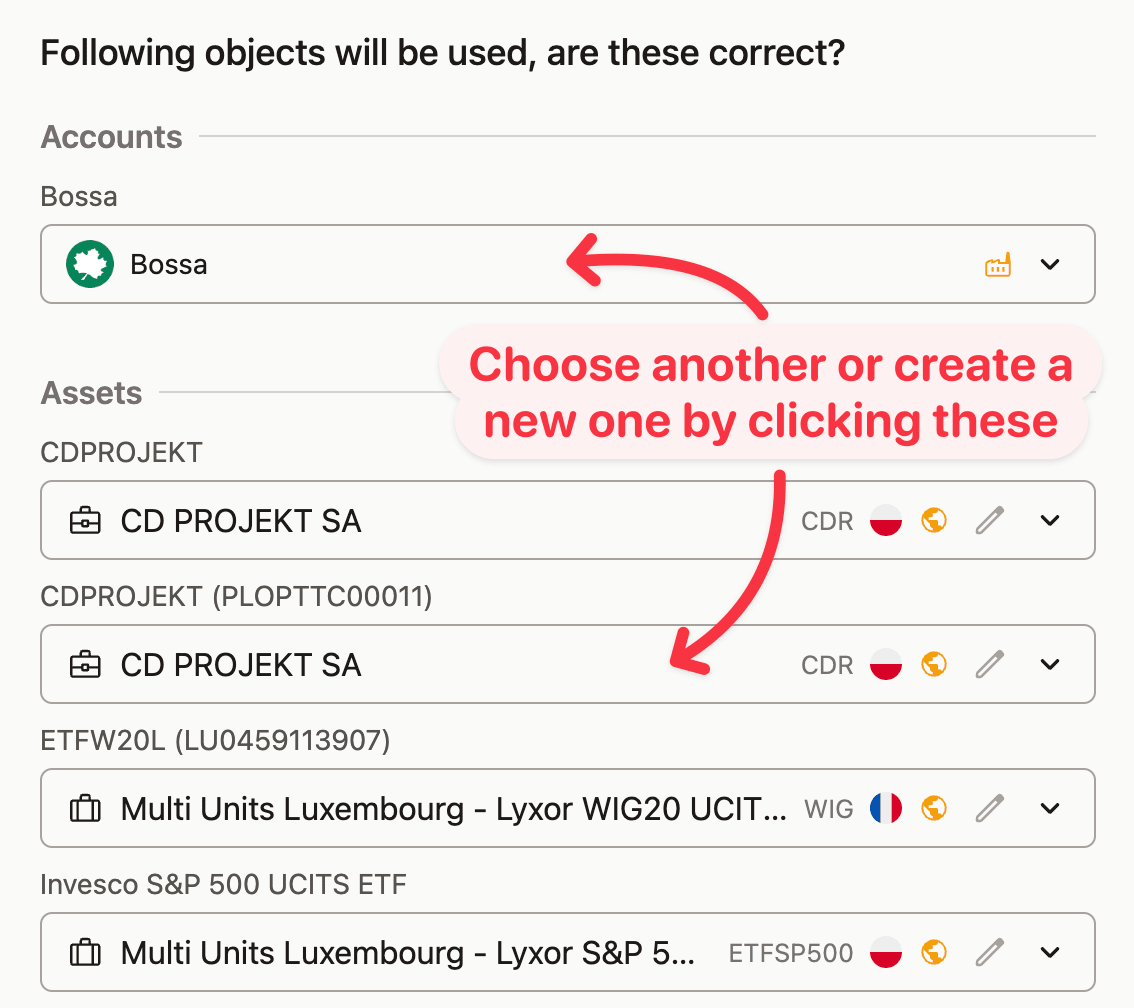
Missing market symbols
If you can't find a symbol that is actively traded on one of the markets that we support - please let us know through support@mycapitally.com and we'll do our best to add it.
If you don't want to import a certain transaction - just change it's Status. Some of the transactions can be already ignored - either because they're not supported, or they're already imported - you can check the reason by hovering on the info icon next to status.
You can update the status of multiple rows at once by selecting them and changing the value on any of the rows.
Additionally, the rows can be sorted by clicking on the column headers for easier review.
Duplicates, updates and unsupported rows
Duplicate means the transaction is already in your project, which is what makes re-importing the same file — or an overlapping date range — safe. Switch a row to Update to overwrite the stored values instead, the way to pull in a fee or dividend tax your source restated later. Not supported means we haven't seen that transaction type in this format before: the row is skipped, everything else imports, and nothing is blacklisted — skipped rows exist only inside that import session, so once the type is handled you re-import the same file and only the missing rows come in.
See Duplicates and re-importing for what gets compared and how to change many rows at once.
Step 4: Review the account balances
On the last screen you can verify if the account balances are what you expect. If no - just go back to the previous screen and make amendments. If yes - click Import to accept the changes.
Undoing the import
You can undo the whole import if you spot any issues later on. Either from the toast that's shown right after the import, or later on from the top-right menu.
We'll ask you to save the preset for later reuse and you're done. The next time you will be importing similar data, just reuse the preset and import it in seconds. ##